
Oh, friends, do I have a treat for you today! There’s something so wonderfully comforting about finding new ways to enjoy our favorite veggies, especially when they turn into something truly special. I remember the first time I made these — I was trying to use up a beautiful eggplant from the farmer’s market, and I wanted something more exciting than just roasted slices. What emerged from my kitchen that day were these incredible, crispy-on-the-outside, tender-on-the-inside Tasty Eggplant Balls, and they’ve been a family favorite ever since. They’re just so satisfying!
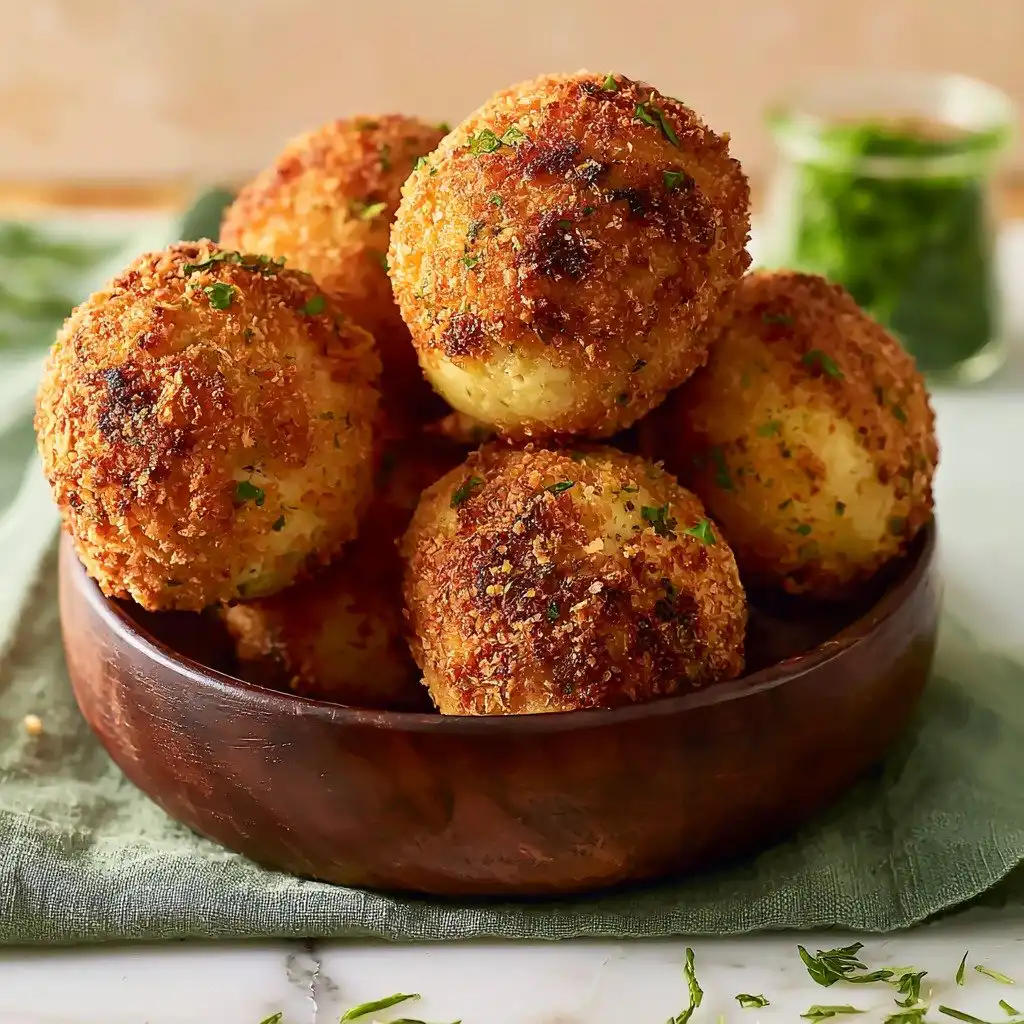
Why You’ll Love This Tasty Eggplant Balls
- They’re wonderfully crispy on the outside and incredibly tender and flavorful on the inside.
- You can whip them up with simple ingredients you likely already have in your pantry.
- They’re super versatile – perfect as an appetizer, a side dish, or even a light meal.
- This recipe is a fantastic way to enjoy eggplant, even for those who are a little skeptical!
Ingredients You’ll Need
- Eggplant: This is our star! Dicing it into 1/2-inch cubes helps it cook evenly and makes sure it gets perfectly soft for our mixture.
- Parmesan: I find that Kraft grated parmesan works wonderfully here for that classic savory, salty kick.
- Breadcrumbs: We use two kinds! Regular breadcrumbs for the mixture to help bind everything, and then Italian-style breadcrumbs (like Progresso) for that irresistible crispy coating.
- Oil: A neutral oil like Wesson vegetable oil is perfect for roasting the eggplant and then for frying, ensuring the eggplant’s flavor shines through.
- Egg: Our binding agent! It helps hold the eggplant mixture together so our balls don’t fall apart.
- Parsley: Fresh herbs add a lovely brightness and a pop of color.
- Garlic Powder: A little goes a long way to add that essential aromatic flavor without overwhelming the eggplant.
- Salt and Pepper: The basics! Essential for seasoning and bringing out all the other flavors.
- Dried Oregano: This is for the coating, giving it that classic Italian-inspired aroma and taste.
How to Make Tasty Eggplant Balls Step by Step
First things first, get your oven ready! Preheat it to 400°F (205°C). While it’s heating, grab your diced eggplant and toss it with about 1/4 cup of your oil. Spread those lovely purple cubes out on a baking sheet in a single layer. Now, pop them in the oven and roast for about 25-30 minutes. Make sure to give them a good stir halfway through so they cook evenly. You’re looking for them to be super soft and beautifully golden. This step is super important because it really brings out the eggplant’s flavor and gets rid of extra moisture, which means perfectly textured balls later!
Once your eggplant is roasted, transfer it to a fine-mesh strainer. Let it cool down and drain for at least 10 minutes. I always gently press on the eggplant with the back of a spoon to squeeze out as much liquid as possible. Trust me, this prevents a soggy mixture! Next, in a big bowl, combine that cooled, drained eggplant with the parmesan, 1/2 cup of plain breadcrumbs, the egg, parsley, garlic powder, salt, pepper, and dried oregano. Now, get in there with your hands or a wooden spoon and mix everything really well until it’s all combined and holds together when you squeeze it. It should be moist, but not wet. If it feels a little too loose, don’t worry, just add another tablespoon or two of plain breadcrumbs until it’s just right.
Now for the fun part – shaping! Use your hands or a small ice cream scoop to roll the mixture into golf ball-sized spheres. You should end up with about 16-20 of these little gems. Pour your Italian-style breadcrumbs into a shallow bowl. Take a few eggplant balls at a time and roll them in the breadcrumbs, making sure they’re completely coated on all sides. Gently press so the breadcrumbs stick. I like to let them rest on a parchment-lined plate for a few minutes before frying; this helps the coating set and keeps it from falling off. Finally, heat the remaining 1/2 cup of oil in a large skillet over medium-high heat until it shimmers. Fry the balls in batches, rolling them gently, until they’re golden brown all over, about 4-6 minutes total. Transfer them to a paper towel-lined plate to drain, and then they’re ready to enjoy!

My Top Tips for Success
- Don’t skip roasting the eggplant: I always roast the eggplant until it’s super soft and golden. This step is key for flavor and texture.
- Drain the eggplant thoroughly: Trust me on this one, pressing out excess liquid after roasting prevents your balls from being mushy.
- Don’t crowd the pan: In my experience, frying in batches ensures even browning and keeps the oil temperature consistent.
- Let the breaded balls rest: I always let them sit for a few minutes before frying. It helps the coating stick perfectly.
- Use a neutral oil for frying: This allows the delicious eggplant flavor to shine through without any competing tastes.
Common Mistakes to Avoid
- Not draining the eggplant enough: This is a big one! If your eggplant mixture is too wet, your balls will be soft and won’t hold their shape well. Press out that liquid!
- Over-mixing the eggplant mixture: While you want it combined, don’t mash it to a paste. A little texture is nice.
- Frying in oil that isn’t hot enough: If your oil isn’t shimmering, your balls will absorb too much oil and become greasy instead of crispy.
- Crowding the frying pan: This lowers the oil temperature and can lead to uneven cooking and soggy balls. Work in batches!
How to Store Tasty Eggplant Balls
- Refrigerate: Store leftover cooked Tasty Eggplant Balls in an airtight container in the refrigerator for up to 3-4 days.
- Reheat: Reheat in a preheated oven at 350°F (175°C) for 10-15 minutes, or in an air fryer, until warmed through and crispy again.
- Freeze (cooked): Place cooled cooked balls on a baking sheet and freeze until solid, then transfer to a freezer-safe bag for up to 2-3 months. Reheat from frozen in the oven.
- Freeze (unfried): You can also freeze the shaped, unfried balls (without the breadcrumb coating) on a baking sheet until solid, then transfer to a freezer-safe bag. Thaw in the fridge before coating and frying.
Frequently Asked Questions
Can I bake these instead of frying them?
Yes, you can! For a healthier option, you can bake the shaped and breaded balls at 400°F (205°C) for about 20-25 minutes, flipping halfway, until golden brown. They won’t be quite as crispy as fried, but still delicious.
What can I serve with these eggplant balls?
These are incredibly versatile! They’re fantastic with a marinara dipping sauce, a fresh lemon-garlic aioli, or even tossed with pasta. They also make a great side dish to grilled chicken or fish.
Can I make the mixture ahead of time?
Absolutely! You can prepare the eggplant mixture (before shaping and breading) up to 24 hours in advance. Store it in an airtight container in the refrigerator, then shape and fry when ready.
Why did my eggplant balls fall apart while frying?
This usually happens if the eggplant mixture was too wet or if the oil wasn’t hot enough. Make sure to thoroughly drain the roasted eggplant and ensure your oil is shimmering before adding the balls.
Can I use different cheeses?
While parmesan gives a classic flavor, you could experiment with other hard, salty cheeses like Pecorino Romano for a slightly sharper taste. Just be aware the flavor profile will change a bit.
I really hope you give these Tasty Eggplant Balls a try! They’re such a delightful and satisfying way to enjoy eggplant, and I just know you’ll love them as much as I do. If you make them, please let me know how they turn out!